• Ernie Ball
  • MusicMan
  • Sterling by MusicMan

Slick65

New member
Joined
Feb 13, 2016
Messages
3
Hello

Just a quick question about the Axis models I have. Do any of yours need to be shimmed because of high action.? Mine did and I was wondering if this is common on these guitars.
I'm a long time player and new to the Axis and WOW where have I been, outstanding guitars !
 

ozzyrules

Well-known member
Joined
Dec 31, 2010
Messages
2,577
Location
Southeast Louisiana
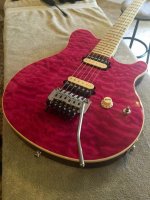
None of mine are shimmed. Here's a copy of the "faq" from EBMM website; sorry it's so long. And, we need pics of your guitars:

Axis/Non-Floating Locking Tremolo

Notes:
The Axis guitar is designed for the tremolo to sit flat on the body, and only allow movement in the dive-bomb direction.
Because the bridge is limited in its adjustability via the pivot screws, the string height is primarily adjusted by adding or removing shims from the neck pocket. If you are not comfortable with removing the neck from your guitar, do not attempt to re-shim the neck. Instead, take your guitar to a qualified tech or contact Music Man Customer Service to arrange for your guitar to be sent to the factory for a setup.
If adjusting the intonation, it's recommended to use full-size hex drivers, preferably with a T-handle. It's easiest to set the intonation using one 2.5mm driver to loosen/tighten the intonation screw, while simultaneously using a second driver to move the saddle with some amount of string tension still on the saddle.
Keep in mind that the entire Axis setup mainly amounts to the truss rod adjustment and the shim in the neck pocket. This guide may seem overly extensive, but it is intended to explicitly describe the processes needed to take the neck on and off, work with the mechanics of a locking tremolo, etc. The bulk of this guide is intended to check all the metaphorical boxes of settings that should already be correct on most guitars and not require any adjustment.

1. String the guitar
a. Cut the ball end off each string, insert the cut end into its respective saddle, and clamp the string in place with the lock screw.
b. Remove the clamping blocks/screws from the nut and set aside.
c. String the guitar normally.
2. Adjust the fine tuners on the bridge to sit in the center of their overall travel.
a. Completely loosen one tuner, and completely tighten the next. Set a third tuner in the center of these two, and adjust the others to match the centered one.
3. Set the bridge plate
a. Tune up the inner 4 strings (A,D,G,B) until some amount of string tension is placed on the trem system.
i. Having both spring and string tension will help keep the bridge from “jumping” on the pivot screws and closer to its natural resting place while performing the setup.
ii. Full string tension, tuned to exact pitch, is not necessary.
iii. Tension is only placed on the inner 4 strings as to not permanently nick the outer strings while adjusting the pivot screws.
b. Adjust the pivot screws until the bridge sits flat and level on the face of the body.
i. There is a small retainer plate on the underside of the main bridge plate. This plate is what contacts the face of the body. The bridge should sit flat across the back edge of this plate.
ii. By raising and lowering the pivot screws, the back corners of the plate will either:
1. lift straight off the body by raising the pivot screw on the same side
2. lift by being levered off the body by raising the opposite pivot screw
iii. The only points the bridge should contact are the two pivot screws, and the back edge of the small retainer plate.
c. Move the trem through its full range of motion and check that it moves smoothly and unimpeded.
4. Tune to pitch.
5. Ensure the tremolo springs have enough tension so at full tension, the bridge plate doesn't lift off the body.
a. If the plate lifts, tighten the tremolo claw screws to add appropriate spring tension.
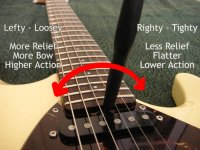
6. Adjust truss rod – This step is critical; all other adjustments will be affected to some extent when the amount of neck relief is altered.
a. Hold down the low “E” string at the first and last frets. You will effectively be using the string as a straight edge to see the amount of relief in the neck.
b. Visually gauge the space between the bottom of the string and top of the 7th fret wire, if there is any. If there is no gap, loosen the truss rod adjustment wheel until one appears.
c. Tighten the truss rod until the neck is flat, then loosen slightly so there is a small amount of space between the string and 7th fret. You can check the amount of relief by tapping on the string while fretting, and viewing its movement in relation to the frets.
d. Perform the same visual check and adjustment on the high “e” string to ensure there is some amount of bow on both sides of the neck.
7. Check the string height at the nut.
a. The locking nut height is set using metal shims under the nut. It's unlikely the height will need to be adjusted, but it's not unwise to confirm the height is correct.
b. Press down any string between the 2nd and 3rd frets to effectively fret the string at the 2nd fret from the nut side.
c. Tap on the same string over the 1st fret wire and observe the gap between the string and fret.
d. This gap should be as small as possible without the string actually touching the 1st fret, while the 2nd fret is being held down.
i. The nut can be set higher to prevent open string buzz, especially on the bass side.
e. If necessary, un-screw the nut from the neck and add or remove shims from underneath the nut to achieve the correct height.
i. The factory shims are either brass (Used with 1st and 2nd generation Axis/EVH models with Gotoh tremolos), or stainless steel (current generation, used with OEM Music Man tremolos). The thicknesses used are .1mm and .3mm (.004” and .012”, respectively). While factory shims are recommended, any material of the same shape and thickness can work.
8. Set the string height/action.
a. The action is set at 4/64” (1.6mm) across all open strings, measured at the 12th fret.
b. Using a 6” (150mm) ruler, measure from the top of the 12th fret wire to the bottom of each string. The 4/64” line should be just visible under each string.
c. If the action is high, a thicker shim is needed in the neck pocket. If low, a thinner shim is needed. Minor height adjustments (less than 1/64”/.4mm) can be made using the bridge pivot screws.
i. The bridge can be raised slightly off-level to tilt back toward the end pin, but it cannot be lowered to tilt toward the pickups. (When the bridge is set too low, it can wedge between the pivot screws and body. This can cause the bridge to bind and not return to the correct pitch after using the tremolo.)
ii. The factory shims are plastic strips placed between the neck screws closest to the pickups, color coded to the following thicknesses:
1. Brown - .010”
2. Pink - .015”
3. Yellow - .020”
4. Black - .030”
iii. Moving one size up or down will generally adjust the action slightly more than 1/64”, and slightly less than 2/64”.
1. e.g., If the action is measured to be 5/64” with a pink shim, a yellow shim will usually put the action slightly under 4/64”. Install the yellow shim and adjust the bridge pivot screws slightly higher to get to 4/64”.
iv. While it's recommended to use factory shims, any material of the same shape and thickness can be used to shim the neck.
d. To remove the neck:
1. Place a folded piece of cardboard between the bridge's string lock screws and body. The cardboard should fit snugly; it's purpose is to keep the bridge from popping off the saddles when the string tension is removed.
2. De-tune all strings. Optionally, a small amount of tension can be left on the strings to hold the neck and body in place when the neck screws are removed.
3. Remove all five neck screws and the neck plate.
4. Lay the guitar down flat, facing up.
5. Gently lift the neck out of the pocket, taking care to not delaminate or chip the finish off the body around the pocket.
6. Remove the installed shim and replace with one of an adequate thickness.
e. To replace the neck:
1. Gently lower the neck back into the pocket (with the correct size shim installed)
2. Holding the entire neck joint firmly together, flip the guitar over onto its face. The neck should be placed onto an elevated surface or neck rest/caul. Elevating the neck causes the heel to lever into the body pocket, especially with some amount of tension left on the strings.
3. Replace the neck plate and insert the neck screws back into the body.
4. Grasp the neck, body and plate firmly in one hand and hold the guitar on end, balanced on the end pin.
5. Fully drive the neck screws back in.
1. Start with the center screw on the flat side of the neck plate, followed by the opposite screw on the contoured edge, and finish with the outside three. (This order minimizes the risk of cracking the finish at the corners of the plate.)
ii. Ensure the neck screws do not thread in the body. This can prevent the neck from seating properly. i.e., When removing the screws with a powered screwdriver or drill, the screws should thread out of the neck, but spin in the body. If the screws are threading, the holes through the body can be reamed out to a #19 wire gauge drill size diameter (.166” or 4.25mm).
9. Set the tremolo spring claw
a. From the factory, the tremolo is set to remain flat on the body if a note is bent a full step or less.
b. Bend the G note at the 12th fret to an A, and check if the bridge is lifting.
c. Adjust the spring claw so the bridge begins to lift when this note is bent beyond an A.
10. Set the intonation.
a. Tune string to pitch using the 12th fret harmonic.
b. Check the pitch of the same note at the 12th fret, but fretted.
c. If the fretted note is sharper than the harmonic, the string length is too short and the saddle needs to be moved back in the direction of the endpin. If the fretted note is flat, move the saddle forward in the direction of the neck.
i. The locking tremolo's saddles are held in place by 2.5mm hex drive screws at the front of the saddle. To adjust a saddle's location, loosen the screw, and the saddle will move freely. Move the saddle to the desired location and re-tighten the screw.
d. Check the note again and re-adjust saddles as necessary.
11. Stretch the strings.
12. Install the clamping blocks/screws onto the nut and tighten fully.
13. Move the tremolo through it's range of motion and adjust the tuning with the fine tuners on the bridge. If necessary, unlock the nut, re-tune with the standard tuners, and repeat.
14. Double check the setup and enjoy!!
a. If experiencing fret buzz on the first few frets (1~4), the truss rod needs to be loosened. If experiencing buzz in the middle of the neck (frets 6~10) the truss rod needs to be tightened.
b. If experiencing fret buzz across the entire neck, the overall string height needs to be raised.
 

Flash Gordon

Well-known member
Joined
Oct 8, 2013
Messages
472
Location
NW Burbs - Chicago
I've never shimmed any of my axis guitars (6). I adjust by increasing/decreasing the relief in the neck via truss rod, and/or increasing/decreasing the height of the bridge slightly. There are some good videos on YouTube.
 
Last edited:

Slick65

New member
Joined
Feb 13, 2016
Messages
3
Thank you very much ! This did help, I will try to post pics, here is what I went crazy on this past year. I sold my 70's strats and a Flying V for the following.
2011 Axis Limited purple quilt
2013 Axis Limited purple quilt
2013 Axis Limited Pink Quilt
1997 Axis Amber quilt mega birdseye maple neck.
 

Eigenvector

Member
Joined
Oct 23, 2016
Messages
5
Hi!

I now have a EBMM 1992 EVH (translucent black) guitar.

Is there an "owner's manual" of some sort? Did not come with the purchase. The neck is too straight, needs to be bowed a little. Also, I can't get the damn vibrato bar off!!! I don't want to force anything, this sucker is 1 of 600 or so. It is in good shape overall, neck to flat, back of neck needs to be cleaned.

Any help would be appreciated.
 

Eigenvector

Member
Joined
Oct 23, 2016
Messages
5
Looking from the body end of the guitar down the guitar neck, turn the truss rod adjustment nut to the left.

Did it. Buzzing has stopped, but action is too high. The bridge is as low as it can go. From reading the rest of this thread, it sounds like a shimming is in order. Where do I get the various color shims?
 

drimacdaddy

Member
Joined
Apr 16, 2017
Messages
6
Axis with formerly floating trem system

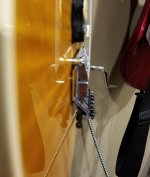
Hi. I just purchased a used Axis (Floyd Rose). I was disappointed to find that the previous owner (or someone), had floated the trem system. To get my Axis back to the original condition, I removed the neck to check for shimming...in the pocket next to the neck pickup, i found...

1. top layer, cut up credit card
2. middle layer, pink plastic, cut around the screw holes
3. half of a Gibson thin guage plastic pick

Just to be on the safe side, I removed one layer at a time, reset the neck, and tightened the inner 4 strings, according to the EBMM instructions. I had to remove all three layers, and raise the front of the trem about 1mm from flat, to stop the buzzing on the low E and A strings. The guitar sounds great and the trem is working well, but the action is super low...just over 1mm at the 12th fret. No buzzing unless i'm playing the low strings high up the neck (above the 15th), and really hitting hard.

Question 1) to get the trem perfectly flat, should I shim the neck pocket 'away' from the neck pickup? I've not seen anything in the forums or in the EBMM instructions about shimming anywhere but right against the neck pickup, so i'm not sure shimming away from the neck pickup is 'legal' ;)

Question 2) I've found that the neck screws are threaded into the body, as well as the neck. I see in the instructions, EBMM suggests drilling out the body so the screws only thread into the neck. Is this a good idea (i'm pretty handy, but this is a really nice guitar, and I really don't want to screw it up)?

Thanks

P.S. (before you ask, there are no luthiers near me I would trust to touch this guitar...sad but true :( )
 
Last edited:

jones4tone

Well-known member
Joined
Jun 24, 2016
Messages
988
Location
Texas
Could slight adjustments to saddle height and/or the truss rod allow you to level out the bridge now?
 

drimacdaddy

Member
Joined
Apr 16, 2017
Messages
6
Sorry, Jones...i had given up that anyone would give an opinion...thanks for responding. I've been playing the Axis since my original post with 0 issues. I was concerned at first that the bridge was about 1mm from level, but in reality, it makes no practical difference. The only complaint i have about the Axis, is that since i got it, i rarely play my JP6 (sad but true :( )
 

Attachments

  • 20170712_224823.jpg
    20170712_224823.jpg
    49.7 KB · Views: 447

jones4tone

Well-known member
Joined
Jun 24, 2016
Messages
988
Location
Texas
Sorry, Jones...i had given up that anyone would give an opinion...thanks for responding. I've been playing the Axis since my original post with 0 issues. I was concerned at first that the bridge was about 1mm from level, but in reality, it makes no practical difference. The only complaint i have about the Axis, is that since i got it, i rarely play my JP6 (sad but true :( )

Glad to hear you're enjoying the guitar! Cheers.
 
Top Bottom