• Ernie Ball
  • MusicMan
  • Sterling by MusicMan

BravoTango

Member
Joined
Mar 16, 2008
Messages
8
I got to the stickers on this thing with a utility knife. The finish remains. I tried sanding...very little effect. I stepped up to a grinding sort of bit on my oscillating tool....barely scratched it. I've got to give it to whoever finished this thing. I thought disassembly was going to be the hard part. Home Depot recommended trying a heat gun. One guy there looked at it and said it may be some kind of baked ceramic finish with glass in it?? I'm officially at a loss...possibly just looking for another body right now.
 

spkirby

Well-known member
Joined
Feb 3, 2004
Messages
1,273
Location
UK
Proves that Musicman uses stronger poly than Washburn as their poly couldn't wait to leap off the body I refinned! From what I've read from guys having problems with poly is that after the chemicals have failed to help, it's either sanding or the heat gun.

Does the chem work on the area where the stickers used to be?

Talk to Customer Service too... for sure they have had to refin a body or two.

You did need something to fill your vacation days ;-)
 

spkirby

Well-known member
Joined
Feb 3, 2004
Messages
1,273
Location
UK
Just renamed the thread Brian to maybe get more input on stripping that MM paint!
 

BravoTango

Member
Joined
Mar 16, 2008
Messages
8
Looks like he used the same stuff that I tried, except that I used the aerosol to no effect. Maybe it's time for another trip to Home Depot.
 

jamminjim

Well-known member
Joined
May 25, 2006
Messages
2,304
Location
Grand Junction, Colorado
How about this stuff. aircraft paint stripper

aircraft-remover-gar343.gif
 

Spudmurphy

Well-known member
Joined
Aug 23, 2005
Messages
12,037
Location
Cardiff, United Kingdom
Hey Jammin - good suggestion but I got started thinking.
Aircraft use a lot of aluminium and the can says that stuff is water soluble.
I wonder if it's a milder stripper as opposed to more aggressive stuff they use on autos?
 

BravoTango

Member
Joined
Mar 16, 2008
Messages
8
Update!

The aircraft remover didn't work either. I had to resort to barbaric methods....although...I didn't try the heat gun...I don't have one...yet. Anyhow...the barbaric methods did do some damage. I think Mr. Kirby probably had a stroke or two when I sent him some earlier pictures. With lots of sanding and patience...here is the result. I am very pleased with the current state of the project. I'm not going to worry about the finish in the cavities that I couldn't get to.

http://i1215.photobucket.com/albums/cc504/BravoTango709/DSC00876.jpg
http://i1215.photobucket.com/albums/cc504/BravoTango709/DSC00875.jpg
 

dibart77

Well-known member
Joined
Jun 15, 2008
Messages
1,491
Location
New York
Wow, that's a cool blank slate for an AMAZING finish! Mary Kaye wouldn't be bad, but I think you can come up with something cooler. I say you go for a Deep Orangeburst finish like this:

qdo6.jpg

Or maybe a goldtop (is it a rosewood fretboard)? A goldtop would look killer since no binding on the ASS.

Good luck!


Last edited:

BravoTango

Member
Joined
Mar 16, 2008
Messages
8
New pics....

Thanks for the comments and ideas guys!

The original plan was to go for the natural look. After looking at lots of options and considering my limited abilities, I'm going to stick with the original plan. Today I bought some Minwax Tung Oil and put on the first coat.

As for questions about the barbaric methods, some of you may want to turn away (and please don't banish me from the forum....remember the nice comments...lol). The following pictures may be disturbing. I had to use a metal grinding attachment to my oscillating tool to get through that finish. 60 grit sandpaper barely scratched it. This put some scratches in the wood...but I reasoned that I could sand them out. Ultimately...that is what worked. I also attempted to use another attachment...a blade that you see on commercials getting under tiles. This one got under the finish and into the wood and left a nasty gouge. I'll show you the original pictures. At this point...I was pretty mortified. I also decided that I had nothing to lose now and would just press ahead and see what happened. I bought an orbital sander and went to work starting with 60 grit sandpaper. Amazingly...with lots of patience...I got all the scratches and gouges out. I then stepped up to 80, 120, 220, and 0000 steel wool....and voila!

http://i1215.photobucket.com/albums/cc504/BravoTango709/DSC00879.jpg
http://i1215.photobucket.com/albums/cc504/BravoTango709/DSC00869.jpg
http://i1215.photobucket.com/albums/cc504/BravoTango709/DSC00868.jpg
http://i1215.photobucket.com/albums/cc504/BravoTango709/DSC00872.jpg
http://i1215.photobucket.com/albums/cc504/BravoTango709/DSC00877.jpg
http://i1215.photobucket.com/albums/cc504/BravoTango709/DSC00881.jpg
http://i1215.photobucket.com/albums/cc504/BravoTango709/DSC00880.jpg
 

Quarter

Well-known member
Joined
Apr 14, 2006
Messages
626
Location
San Diego, North County
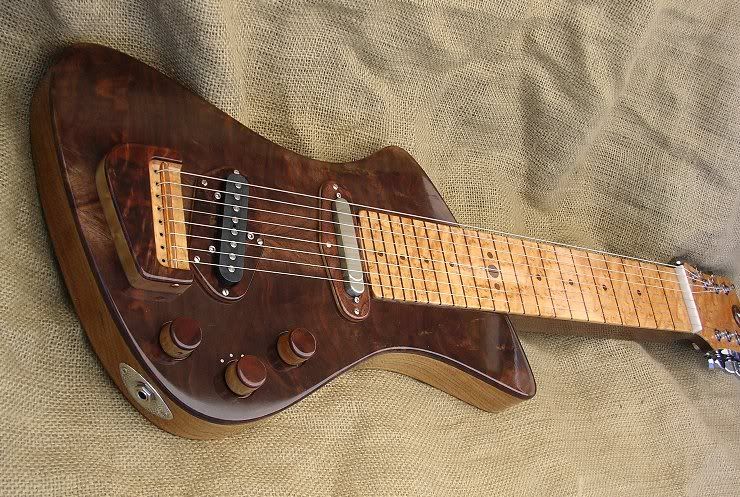
Thats a great looking chunk of ash! For a natural finish I'd recommend Tru Oil, the same stuff that we use for necks. Its my favorite finish for the lap steels I build. This one is chambered swamp ash with a black walnut top in a Tru Oil finish.

.
JYD-001-29s.jpg
 
Top Bottom